Wednesday, April 29, 2015

Stencil Mania at Frilly and Funkie!

Double click any photo to zoom in for details.

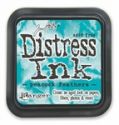
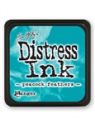
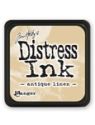
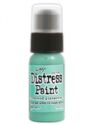
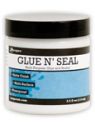
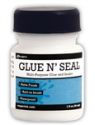
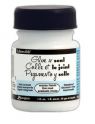
Welcome to my bog!  I'm here today with a project using stencils for my Funkie week at Frilly and Funkie.  Stencil love continues with a fresh line-up from the Funkie side of the team.  I had a blast making this mixed media piece - can you tell?  I started with a 5x7" piece of heavy chipboard and painted it with Cracked Pistachio distress paint, leaving a few spots bare.  Then I slathered it with Glue 'n Seal and laid a piece of Melange tissue wrap over it, scrunching it up a bit in places to give it some texture.  Once dry, there were areas that were not glued down securely so I took advantage of those and ripped the tissue wrap off those places.  Then I sponged the entire piece with Vintage Photo DI. 

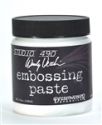
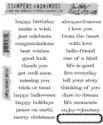
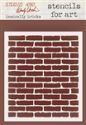
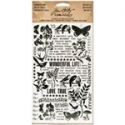
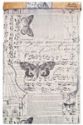
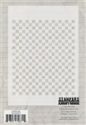
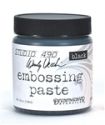
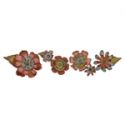
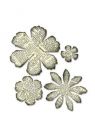
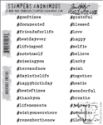
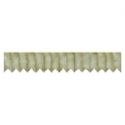
For my stenciling, I grabbed a favorite stencil from Wendy Vecchi, the Checkmate stencil and applied her black embossing paste through it.  For my embellishments, I created a paper flower using my favorite Tattered Flowers decorative strip die.  The back layer was cut from canvas with the Tattered Florals die, all sponged with Vintage Photo.  I used the Spring Greenery decorative strip die to cut a couple of pieces of (non-green) greenery from velum and added a Kaisercraft laser cut wood embellishment topped with a tiny black butterfly from the Butterfly Frenzy decorative strip die along with a banner that I stamped with a sentiment from the Tim Holtz #hastags stamp set, because this whole piece made me happy when I was playing with it.  

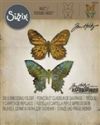
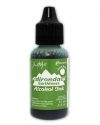
The butterfly was cut with the new Butterfly Duo die and embossed with the texture fade that comes with the die.  I really don't remember how I painted it because it was one of those leftovers from a previous project that pile up around the periphery of my work space.  I believe it was colored with several colors of alcohol ink mixed with Pearl mixative to give it the shine and of course I sponged over that with Vintage Photo.  My little corner filigree started as bronze and was painted black with some Vintaj metal paints.  I cut out an easel stand using the Small Easel die so the piece will be free standing.  Love this one - it is still making me happy.  

Thanks so much for stopping by.  I hope you will visit us over at Frilly and Funkie and maybe link up a vintage style creation or two using stencils.  We would love to have you come over and play!


All the products below were used to make this piece and are available at my on-line store The Funkie Junkie Boutique where Wendy Vecchi, Tim Holtz and most other name brand products are always 20% below MSRP.


Wednesday, April 22, 2015

Spring Birthday


Double click any image to zoom in for details.
Hello and thanks for dropping by.  I'm just sharing a little tag I have for the first week of a new Frilly and Funkie challenge.  Sue Carrington is our lovely hostess this fortnight and she is all about stencils.  Which is great because so am I!  Stencils are all the rage and I can hardly make anything at all without grabbing a stencil or two to create a pattern or a texture on my make.  This week I decided to use a stencil with both ink and embossing paste.

First I grabbed one of the jumbo manila tags that I sell in the shop and am so addicted to.  Using Peacock Feathers DI and a mini ink blending tool, I applied the ink through the stencil on the bottom half of the tag.  Then I misted the ink that was left on the stencil and applied it to the top part of the tag for a mono print.  Love the way it looks with the positive and negative images.  I thought it needed a little texture so I added some white Wendy Vecchi embossing paste through the same stencil on the bottom right corner of the tag.  When it was good and dry, I applied Inka Gold Old Silver with a tiny paint brush.  You should use your finger and sometimes I do, but  I really wanted a delicate look and wanted to make sure I only got it on the raised embossing paste.  I also used the Inka Gold Old Silver on the Spellbinders die cut in the upper left corner.  It was cut from white CS and the Inka gold was applied with my finger.  I glued it down with Multi Medium Matte.

My floral bouquet was made by cutting white CS with the Tattered Flowers decorative strip die and staining them with Shaded Lilac.  I scrunched them around the end of a paintbrush when wet and let them dry in that shape.  Once dry, I opened them very carefully and sponged the endues with Vintage Photo DI.  The leaves were also cut with the same strip die, stained with Bundled Sage, edged with Vintage Photo ann then Inka Gold Old Silver was applied dry brush style.


My sentiment was stamped from Tim's Simple Sayings set using Peacock Feathers DI.  My little banners were cut with the Ribbon Flags decorative strip die from white CS, sponged with Antique linen and a bit of Vintage photo and kissed with Wendy Vecchi's Script background stamp.  Then I stamped Happy Birthday using Peacock Feathers and dipped it into clear embossing powder which stick randomly as some of the ink had dried (which was my intent).

The tag was topped with a triple loop bow made with seam binding and stained with Shaded Lilac distress stain.

Thanks so much for stopping by my blog!  All my cards and other art pieces are for sale starting at $7.50 which includes shipping to USA addresses.  International - contact me for a shipping price to your country.  I need to move some of these pieces out of my craft room and into a good home!  If you are interested, email me at thefunkiejunkie@gmail.com.

Be sure to pop over to Frilly and Funkie to see what our amazing frilly girls have to inspire you.   I hope you will play along by making a vintage style creation using a stencil and linking up to our Frilly and Funkie challenge. Two awards will be given out - one is a badge to the judged winner who will also join us as a guest designer in an upcoming challenge and the other is a $25 gift certificate to shop at The Funkie Junkie Boutique.


These products were used to make the above tag and are available at The Funkie Junkie Boutique, where Ranger/Tim Holtz/Wendy Vecchi and most other name brand products are always 20% below MSRP.


Thursday, April 16, 2015

Brickwork


Double click any photo to zoom in for details.  
Hello!  Thanks so much for stopping by today.  I have a Funkie project for Frilly and Funkie's Spring Die Cuts challenge hosted by our lovely Nicole.  I was strongly influenced by a play I saw over the weekend at our local community theater - Little Shop of Horrors, not that I think any of these lovely flowers is apt to eat anyone - LOL.  But the play was set in New York City's Bowery district and the stage set was largely brick walls.   So when I started thinking about a funkie backdrop for my spring die cuts, all I could think of was those brick walls.

I started with a 5x7" sheet of chipboard for my canvas and sponged it well with Jet Black archival ink.  I was planning to use Ranger embossing paste over it so I didn't want to use anything that was water soluble that the color would be absorbed into the embossing paste.  Once the chipboard was nice and back, I used Wendy Vecchi's brick stencil to apply the embossing paste.  I had to do it in sections and let each section dry before stenciling again so as not to smear the previously laid down paste.  I let it dry overnight and then sprayed it with Dylusions Post Box Red spray ink and hit it with a couple of mists of Lindy's Stamp Gang's Van Dyke Sepia to knock back the red a bit.  In the end, the black mortar was not dark enough so I used a black Stabilo pencil to blacken between each brick...going for a more grungy look.

I just got my hands on the new Tiny Tattered Florals die that arrived in the shop on Tuesday and thought it was a great approach to the spring die cut theme, plus I was dying to try it out :)  I cut out white card stock and used Worn Lipstick, Shaded Lilac and Squeezed Lemonade stains to colorize m flowers.  I dried them with my heat tool and the sponged all edges with Vintage Photo.  I had these very cool little bronze leaves that came in recently and rather than cutting leaves with the dies from the set, I decided to use my new tiny bronze leaves.

I added a little graffiti to my brick wall using Remnant Rubs and Tim's awesome new Remnant Rub tool. The ART stamp is from Wendy Vecchi and I stamped int in Jet Black archival in a ripped piece of Melange Tissue Wrap.  My vine flourish is green paper cord from May Arts that also just came into the shop.  I have it in three colors - very fun embellie (and cheap too).  We have the great DREAM keys in stock too.   So there is my spring die cut project, straight out of the inner city!

Thanks for stopping by.  I hope you will also swing by Frilly and Funkie and leave some love for the other designers on the team.  They have some terrific projects that are sure to inspire you!


The following products are available at The Funkie Junkie Boutique, where Wendy Vecchi, Tim Holtz and most other name brand products are always 20% below MSRP.

Blog Widget by LinkWithin


I changed my font at thecutestblogontheblock.com