Sunday, June 29, 2014

June Tim Tag

I can't even remember the last time I took time to play in Tim Holtz's monthly tag challenge.  I have to thank Alison over at Words and Pictures for lighting a fire under me.  I stopped by her blog earlier and saw what she had done for the June tag and loved it so much I was totally inspired to head into the craft room and start to play.  

I had to chuckle a little when I read about Tim's technique this month because I always do that when there is a lot of ink left on the stencil.  When I spritz it with water to clean it, I usually blot it onto a blank tag of piece of card stock so as not to waste the ink.  I just didn't name it as a technique - LOL! I totally laughed out loud too when he shared how to tie a three loop bow.  Most of us have been doing that for years - in fact, I did a little tutorial on my blog four years ago on how I tie them.  

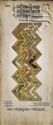
One thing I will say is that I used Tim's distress watercolor card stock to do the technique and the results are much better than I get when I use a tag or a piece of regular CS to blot the ink off the stencil.  And the techique does make an excellent background for your tag or card.  

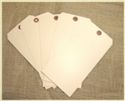
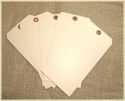
Before affixing the prepared watercolor CS, I also did the same technique on the top and bottom of the tag.  However, there I also sponged over with my distress inks to fill in the colors.  Because I used a jumbo tag, my distress watercolor CS didn't fit so nicely so after gluing it down, I did a little stamping along the top and bottom edge.  Because the layers weren't level, the stamping didn't turn out so good so I took a black marker and filled it in along the edge.  The right and left edges of the watercolor CS were cut with the Torn Notebook On the Edge die.  

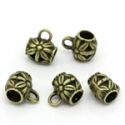
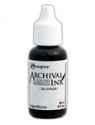
The pear stamp was also stamped onto Distress Watercolor card stock with Jet Black archival ink and watercolored using distress inks and a water brush.  It was finished off with a rayon seam binding bow dyed according to Tim's blog and a couple of metal embellishments.  I really enjoyed this excuse to play this evening!  Thanks so much for stopping by.


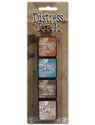
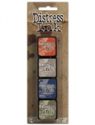
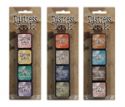
The following products were used to create this tag and are available at The Funkie Junkie Boutique, where Tim Holtz/Ranger products are always 20% below MSRP.


Happy 4th of July!

Greetings friends and visitors,

I know I've been slacking a bit on my crafting.  I missed last week's DT post for Artistic Outpost.  My DH and I were on vacation for 12 days.  I tried to get as much of my postings done ahead of time, but just couldn't manage everything.  So I'm back today for my weekly design team post for Artistic Outpost and have a lot of sparkle and bling to share!  I wanted to do something to celebrate the 4th of July and use the wonderful Hero set.  Love the set and hope that it will be continued with the new releases with the new owners from Artistic Outpost coming out this fall.

I started, as always, with one of the jumbo manila tags that I sell in the boutique.  I covered the entire tag with the Stars layering stencil and applied embossing ink with a Mini Ink Blending Tool and then applied Weathered White EP.  Once I had heat set the EP, I sponged Faded Jeans over the tag and also blotted some Faded Jeans stain on my craft sheet and laid the tag face down it it a couple of times.

I cut a Chevron die cut from plain gray chipboard, stained it with Festive Berries and cut it to fit the tag.  Then I applied Glossy Accents very liberally to the die cut and shook on Festive Berries Distress Glitter.  Once it was dry, I affixed it to the bottom with Ranger Multi Medium Matte.  I also used the off cuts to embellish the top.

I cut a star from chipboard also and painted it white with Picket Fence distress paint, dried it with my heat tool and then did the Glossy Accents/distress glitter application, this time with Clear Rock Candy distress glitter.  A small Tattered Banners die cut was made with white CS, stamped with Festive Berries DI, smudged and edged a bit with Vintage Photo and affixed to the star with a bit of craft foam under it to pop it up.

I decided to finish it off with a "4" cut with the Word play die.  It was cut from chipboard covered with Ranger Foil Tape, then black acrylic paint dabber was applied to make it look tarnished.

That's it for this week.  I hope you are having a wonderful weekend!  Thank you so much for stopping by and for any comment you care to leave.

Oh, and in case you are interested, the DH and I flew to Seattle, spent a couple of lovely day exploring Seattle plus the Washington and Oregon coast and then took a 7 day Alaskan cruise.  Here's a picture of us on a excursion to the Tracy Arm fjord.  It was AMAZING(ly cold)!


These products were used to make the above tag and can be purchased at The Funkie Junkie Boutique where most name brand products including Tim Holtz/Ranger are always 20% below MSRP:

Blog Widget by LinkWithin


I changed my font at thecutestblogontheblock.com