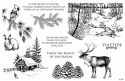
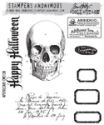
Hello and welcome back to week #2 of the 12 Tags of Christmas Funkie Junkie Style. Last week the predominate theme was black and white chalkboard style. The week, I'm going for Frayed Burlap and Heirloom Gold. I had some good inky fun playing around with the distress stains and Perfect Pearls on my craft sheet, but when the tag was finished, photographed, edited and uploaded, I had a sense of déjà vu and thought "have I CASED myself? I seem to remember using this Artistic Outpost cabin stamp and the wonderful reindeer on the same tag last year", and sure enough, here it is. But after looking it over, I decided it wasn't that close to what I had just made and decided to go with this one anyway.
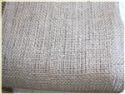
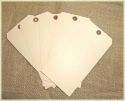
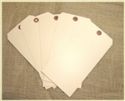
I have a new love affair going with Frayed Burlap. I don't know why I've all of a sudden discovered how wonderful it is, but it seems I've kicked Vintage Photo to the curb and taken up with Frayed Burlap. I started with one of my jumbo manila tags that I so love (and also sell in the boutique), mixing a puddle of Frayed Burlap DS, Picket Fence DS and a sprinkling of Heirloom Gold Perfect Pearls on my craft sheet. I gave it a few mists of water and dredged my tag through it, dried it with my heat tool and repeated the process a couple of times. I didn't get enough Perfect Pearls on it so I pulled out my bottle of Heirloom Gold Perfect Pearls mist and gave it a couple of shots to glitz it up a bit. That did the trick!
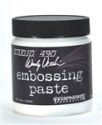
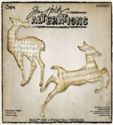
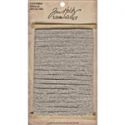
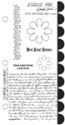
I cut my deer out of chipboard and gave her three coats of gold embossing powder. While the third coat was still soft, I stamped into it with the Wendy Vecchi script stamp, having already prepared it by coating it with embossing ink to keep it from sticking in the soft gold embossing. Her scarf is that wonderful new linen ribbon that Tim Holtz came out with this past CHA. I love the way it stretches and frays (almost like frayed burlap - LOL).
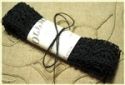
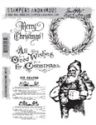
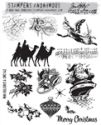
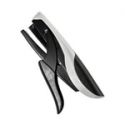
Once my tag was inked up with the distress inks, I stamped the cabin and the two sentiments (from Old Fashioned Christmas and Mini Holidays 4) all in the new Wendy Vecchi Potting Soil archival ink. The stars were cut with the new TH stars Bigz die from gray chipboard, painted with Picket Fence distress paint (2 coats) and when dry, stamped with the script stamp from Apothecary in Coffee archival ink. I dried it well with my heat tool and then spread Glossy Accents over it and liberally sprinkled it with Rock Candy Distress Glitter. I let it dry over night to make sure it was good and hard. The edges were then sponged with Vintage Photo DI. The cheese cloth was dyed with Frayed Burlap. And finally, I used my Tiny Attached and stapled a small piece of the linen ribbon to the top for a hanger.
Well friends, that's it for tag #2. What do you think? Can you find something to inspire you so you can play along? Check last week's post for all the requirements, make something winter holiday related (tag, card, scrapbook layout, home decor piece, etc.) and link it up. You have until midnight Eastern Time on December 22nd to play along. Can't wait to see what you'll make!

The products below were used to create this tag and can be purchased at The Funkie Junkie Boutique where Tim Holtz/Ranger and Wendy Vecchi products are always 20% below MSRP.
 |  |  |  |  |
 |  |  |  |  |
 |  |  |  |  |
 |  |  |  |  |
 |  |  |  |